How to install and configure samba on RHEL 8 – CentOS 8
Contents
Samba provides server and client software to allow file sharing between Linux and Windows machines. Installing and configuring it on RHEL 8 / CentOS 8, is quite easy. Keep reading to learn how to share a directory with samba, and how to apply the appropriate SELinux context to it.
In this tutorial you will learn:
- How to install samba on RHEL8
- How to enable and start the smb and nmb daemons
- How to create a samba share
- How to setup the firewall to allow samba share to be accessed
- How to setup the correct SELinux context for samba to work correctly

Software Requirements and Conventions Used
| Category | Requirements, Conventions or Software Version Used |
|---|---|
| System | Red Hat Enterprise Linux 8 |
| Software | Samba, coreutils and policycoreutils-python-utils packages |
| Other | Permission to run command with root privileges. |
| Conventions | # – requires given linux commands to be executed with root privileges either directly as a root user or by use of sudo command$ – requires given linux commands to be executed as a regular non-privileged user |
Introducing Samba
Samba, as stated in the homepage of the project, is an open source software, released under the GPL license, which allow us to share files and print services using the SMB/CIFS protocol.
The project provides both server and client software to allow interoperation with Windows machines, representing the ideal solution in mixed environments. In this tutorial we will see how to install Samba on Red Hat Enterprise Linux 8, how to setup a samba share, how the setup the firewall to allow access to shared resources, and how to apply the appropriate SELinux context.
Subscribe to Linux Career NEWSLETTER and receive latest Linux news, jobs, career advice and tutorials.
Installation
The first thing we have to do is to install samba on our machine. The package and the needed libraries are available in the official RHEL 8 / CentOS 8 repositories, therefore we can install them just by using yum or dnf. In this version of RHEL/CentOS, the first command it’s just a „link“ to the second:
$ sudo dnf install samba samba-client
The samba-client package is not strictly needed, but the utilities provided by it can be useful. Once the packages are installed, we have to start and enable the smb and the nmb daemons at boot. The first is the daemon which takes care of performing the actual transfers and the sharing operations, while the second performs the NetBIOS name resolutions, allowing the resources to appear when browsing the network on Windows. We can now enable and start both systemd services with just one command:
$ sudo systemctl enable --now {smb,nmb}Configuring the firewall
The next step is the firewall configuration. We must open the appropriate ports, so that the samba-shared resources can be accessible from other machines. The default firewall management software onRHEL 8 / CentOS 8, is firewalld.
Luckily for us, there is no need to open ports manually: all we have to do is to add the „samba“ service to our zone. A „service“ is just an abstraction which let us allow traffic through all the ports needed by a service, by referencing the service name, instead of having to setup (and remember) each port used by it. In case we want to gather information about a „service“, we can run:
$ sudo firewall-cmd --info-service samba
samba
  ports: 137/udp 138/udp 139/tcp 445/tcp
  protocols:
  source-ports:
  modules: netbios-ns
  destination:
From the output of the command we see that the service will allow traffic through ports 173/udp, 138/udp, 139/tcp and 445/tcp. To permanently add the service to the default zone, we can run:
$ sudo firewall-cmd --permanent --add-service=samba
When running the command we used the --permanent switch in order to make our change persistent. We also assumed the default zone to be in use. If we wanted to specify another zone for the action to be applied on, we would have used the --zone option, and provided the zone name as argument (e.g. –zone=external). Since our change is set to be permanent, in order for it to become effective, we must reload the firewall configuration:
$ sudo firewall-cmd --reload
We can verify that the „samba“ service is now part of our zone, by running:
$ sudo firewall-cmd --list-services
cockpit dhcpv6-client http samba ssh
Again, if no zone is specified, the command is applied to the default zone.
Configuring a shared directory accessible by guests
Let’s say we want to share a directory via samba, and we want to let free access to this directory to guest users, without them having to provide a password. To obtain the desired result, we must make some changes to the /etc/samba/smb.conf file, and add a „stanza“ for our share. Open the file with your favorite editor, and in the [global] section, add the highlighted text:
[global]
        workgroup = SAMBA
        security = user

        passdb backend = tdbsam

        printing = cups
        printcap name = cups
        load printers = yes
        cups options = raw
        map to guest = bad user
The map to guest = bad user instruction, will map login attempts with bad usernames to the default guest user, which, by default is nobody. This is needed to allow anonymous access without having to provide a password.
After this change, we must append a new stanza dedicated to our share at the end of the file. We will name the shared resource „linuxconfig“:
[linuxconfig]
        path = /mnt/shared
        guest only = yes
With the above setup we declared that we want to share the content of the /mnt/shared directory, without the need of user authentication. This setup is obviously risky, and is here reported only as an example: in a real world scenario, you may want to at least deny write access to guests (you can do it by adding the writeable = no instruction). To make the changes effective, we must restart the daemons:
$ sudo systemctl restart {smb,nmb}Configure a share accessible only by registered users
To protect access to a resource with a login prompt, when samba is running as a standalone server, we must add an existing user to the samba database. The credentials of this user will be necessary to access the shared directory. For security reasons, it’s a good practice to create a dedicated user for the task, omitting the creation of his home directory, and assigning him a fake shell:
sudo adduser -M sambauser -s /sbin/nologin
The -M option passed to the command is the short form for --no-create-home, which is quite self-explanatory; the -s option, instead, let us specify a shell, in this case an invalid one on purpose: /sbin/nologin. At this point the user doesn’t even need to have a password set on our system.
Once the user is created, we need to add it to the samba database: we can perform the operation by using the smbpasswd command:
$ sudo smbpasswd -a sambauser
New SMB password:
Retype new SMB password:
Added user sambauser.
After running the command, we are prompted to assign a password for the user, and also to confirm it: this password will only be valid in the samba context, doesn’t have anything to do with the user account on our system. To restrict the share we previously created, we have to make a little change in the dedicated section:
[linuxconfig]
        path = /mnt/shared
        guest ok = no
We can verify that our setup is valid, by using the testparm command:
Subscribe to Linux Career NEWSLETTER and receive latest Linux news, jobs, career advice and tutorials.
$ testparm
Load smb config files from /etc/samba/smb.conf
rlimit_max: increasing rlimit_max (1024) to minimum Windows limit (16384)
Processing section "[homes]"
Processing section "[printers]"
Processing section "[print$]"
Processing section "[linuxconfig]"
Loaded services file OK.
Server role: ROLE_STANDALONE
Again, we must restart the smb and nmb daemons for our changes to be effective. The shared directory will now be accessible only after providing the correct credentials.
Setup SELinux for samba
SELinux is often saw like a complication, and disabled right away. This is not necessary: we only must learn how to configure it, and take advantage of the enhancement in security it provides. In order for our samba share to work when SELinux is in „enforcing“ mode, we must assign the appropriate context to our shared directory and files:
$ sudo chcon -R -t samba_share_t /mnt/shared
In the example above, we used the chcon command with the -t option, to change the TYPE section of the SELinux context to samba_share_t. We also used the -R switch to make the command recursive. This change will survive a reboot, but not a relabeling of the system if a default policy exists for our directory and files, because in such case the default setup would be re-applied.
If we want our change to survive a relabeling event, we must add our rule to the policy. We can do this by using the semanage command:
$ sudo semanage fcontext -a -t samba_share_t "/mnt/shared(/.*)?"
Since we used the (/.*)? regex, the rule will be applied to all the content of the „shared“ directory, and to the directory itself. We can verify that our rule has been added to the policy by listing the labels in use on our system:
$ sudo semanage fcontext -l | grep /mnt/shared
/mnt/shared(/.*)?                                  all files          system_u:object_r:samba_share_t:s0
We should now have a working samba setup. To further tweak samba configuration we may need to also manipulate SELinux booleans. For example, when adding existent users to samba, to let their home directories be shared, we must enable the dedicated SELinux boolean. To list all booleans related to samba, we can run:
sudo semanage boolean -l|grep samba
samba_create_home_dirs         (off  ,  off)  Allow samba to create home dirs
samba_domain_controller        (off  ,  off)  Allow samba to domain controller
samba_enable_home_dirs         (off  ,  off)  Allow samba to enable home dirs
samba_export_all_ro            (off  ,  off)  Allow samba to export all ro
samba_export_all_rw            (off  ,  off)  Allow samba to export all rw
samba_load_libgfapi            (off  ,  off)  Allow samba to load libgfapi
samba_portmapper               (off  ,  off)  Allow samba to portmapper
samba_run_unconfined           (off  ,  off)  Allow samba to run unconfined
samba_share_fusefs             (off  ,  off)  Allow samba to share fusefs
samba_share_nfs                (off  ,  off)  Allow samba to share nfs
sanlock_use_samba              (off  ,  off)  Allow sanlock to use samba
tmpreaper_use_samba            (off  ,  off)  Allow tmpreaper to use samba
use_samba_home_dirs            (off  ,  off)  Allow use to samba home dirs
virt_use_samba                 (off  ,  off)  Allow virt to use samba
In the output above, the second column indicates the current value of the boolean, while the third the default one (both are off, in this case). The boolean we want to activate, to enable the sharing of home directories, is samba_enable_home_dirs. We can perform the operation by using the setsebool command:
$ sudo setsebool samba_enable_home_dirs=1
Conclusions
In this tutorial we saw how to install samba on a RHEL 8 / CentOS 8 system. We also saw how to share a directory, allowing access to guests or restricting it to authenticated users. We also saw how to configure the firewall in order for the share to be accessible from other machines on the network.
Finally, we saw how to perform the needed changes in order to have a working samba setup with SELinux in „enforcing“ mode. If you are interested SELinux, you can also read our article on the subject.
Source: https://linuxconfig.org/install-samba-on-redhat-8
How to Install and Configure Samba on CentOS 8
Windows and Linux systems are structured differently and often, a peaceful co-existence between the two is often a challenge. Thanks to Samba, the two systems can now share files and folders over the network. So what is Samba? Samba is a free and open source protocol that allows files to be shared across both systems in a simple and seamless manner. You can have a Samba server on a Linux server hosting various files and folders which can be accessed by windows clients. In this tutorial, you will learn how to install and configure latest version of Samba on CentOS 8. You will also learn how to share a folder from CentOS 8 system to Windows system using samba.
Step 1) Install samba and necessary packages
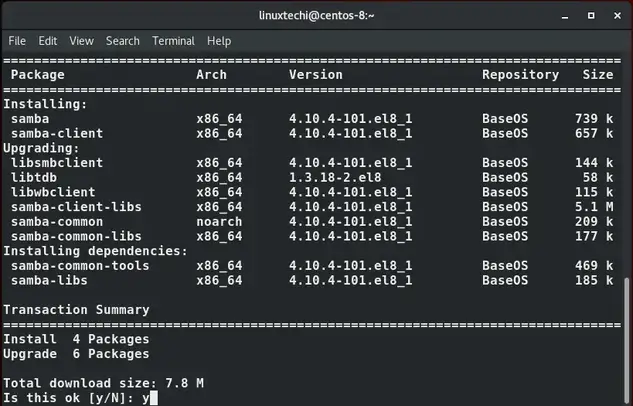
Log into your server and run the command below to install Samba and its dependencies.
$ sudo dnf install samba samba-common samba-client
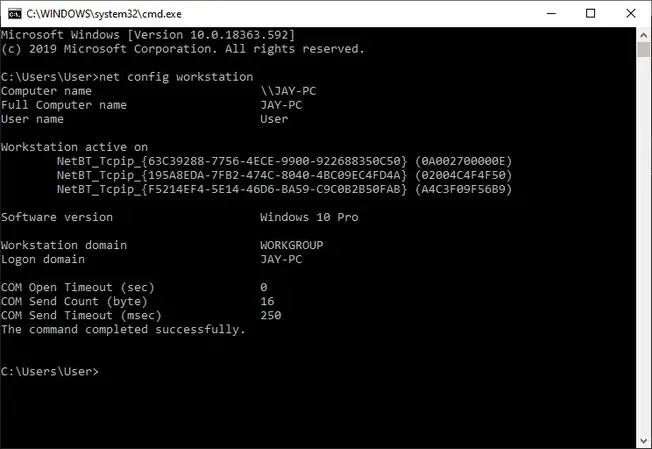
We must also ensure that the Windows and Linux system are in the same workgroup. So, go to your Windows PC and launch command prompt. Type the command:
> net config workstation
From the output, we can clearly see that the workstation domain points to ‘WORKGROUP’.This will also be configured later on the Linux machine.
Step 2) Configuring Samba
Having installed Samba, it’s time to make a few configurations. But before we do that, we need to back up the samba config file. So, run the command below:
$ sudo mv /etc/samba/smb.conf /etc/samba/smb.con.bak
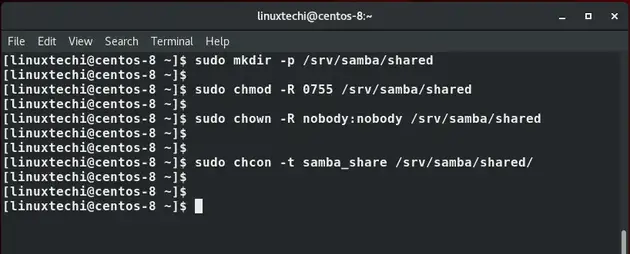
Next, we are going to create a shared folder called shared and assign the necessary permissions and ownership as shown.
$ sudo mkdir -p /srv/samba/shared
$ sudo chmod -R 0755 /srv/samba/shared
$ sudo chown -R nobody:nobody /srv/samba/shared
$ sudo chcon -t samba_share_t /srv/samba/shared
Now create a new samba configuration file
$ sudo vim /etc/samba/smb.conf
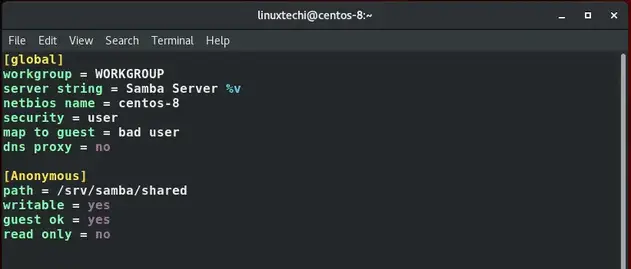
Append the configuration below:
[global]
workgroup = WORKGROUP
server string = Samba Server %v
netbios name = centos-8
security = user
map to guest = bad user
dns proxy = no

[Anonymous]
path = /srv/samba/shared
browsable =yes
writable = yes
guest ok = yes
read only = no
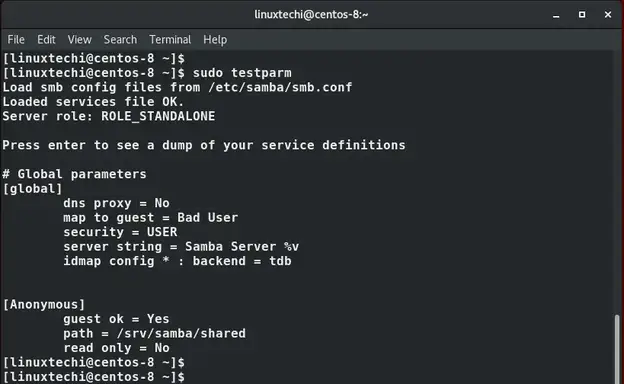
Save and close the configuration file. To verify that the configuration is sound, run testparm command
$ testparm
Step 3) Allow samba service on the firewall
Next, allow Samba across the firewall so that outside users can access samba shares.
$ sudo firewall-cmd --add-service=samba --zone=public --permanent
$ sudo firewall-cmd --reload
Step 4) Start and enable Samba services
Finally, start and enable Samba & nmb services
$ sudo systemctl start smb
$ sudo systemctl enable smb
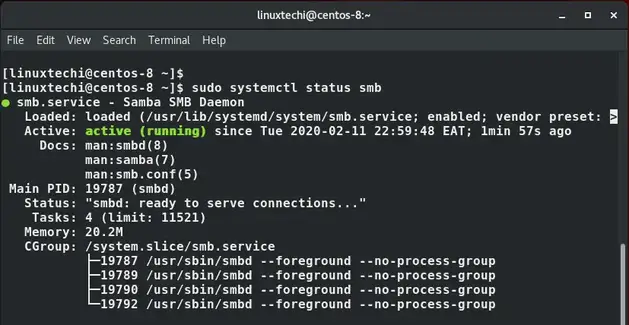
Then confirm if smb service is running:
$ sudo systemctl status smb
$ sudo systemctl start nmb
$ sudo systemctl enable nmb
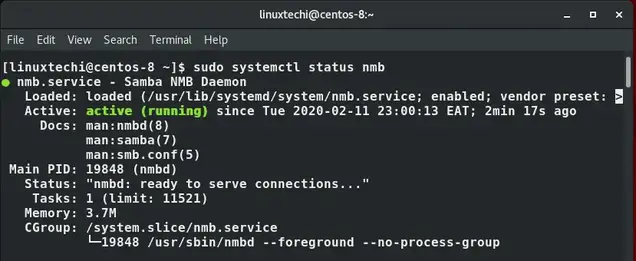
Similarly confirm if nmb service is running just like we did with smb service:
$ sudo systemctl status nmb
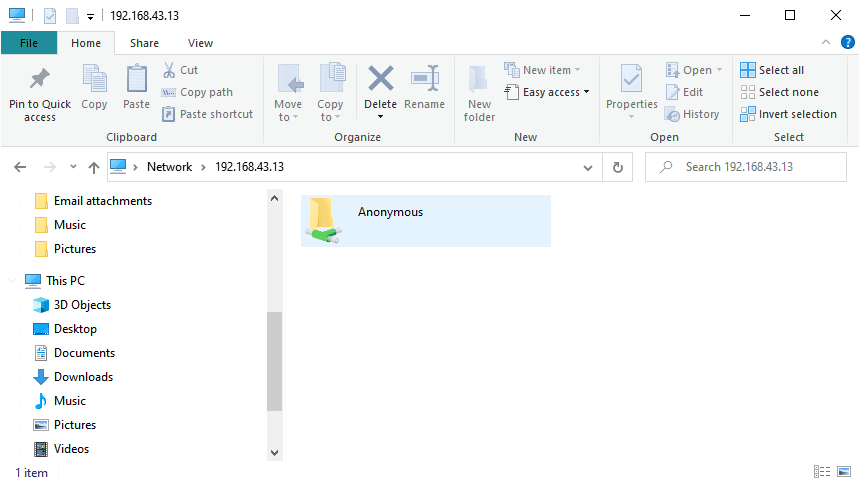
Step 5) Accessing Samba share from windows machine
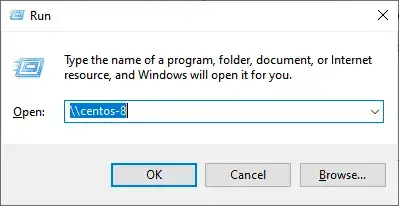
From your Windows PC, press Windows Key + R to launch the Run dialog and type
\\hostname-of-samba server
OR
\\IP-address-of-samba-server
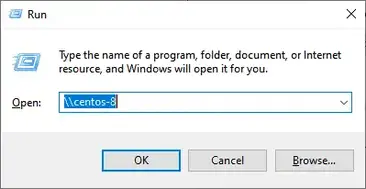
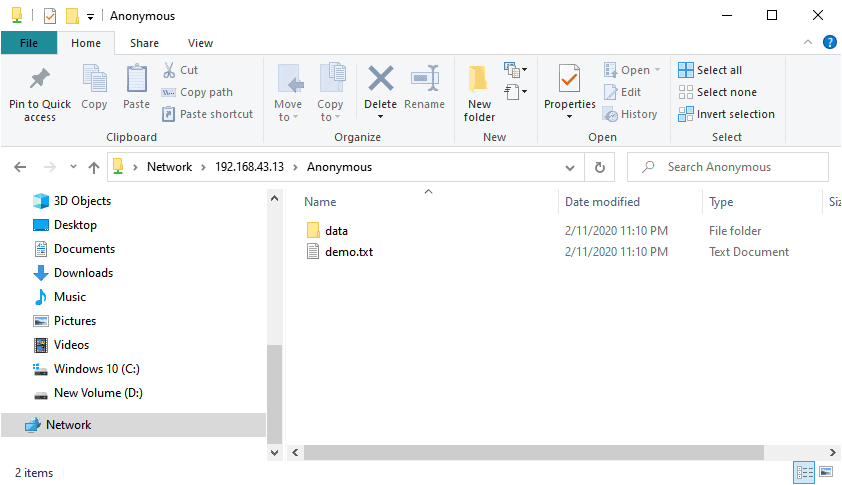
This opens a window below with an ‘Anonymous’ folder.
You can create files either from Samba server or from the client and share it with other users

Creating secure shares in Samba
The file share we just created is accessible to everyone and any user can create and delete files. This poses a challenge if you want to share critical documents as they can be overwritten or deleted as well. For this reason, we need to create a secure file share to address this challenge.
First, we are going to create a new group for samba users as shown:
$ sudo groupadd secure_group
Then we shall add a new user to the newly created group
$ sudo useradd -g secure_group linuxuser
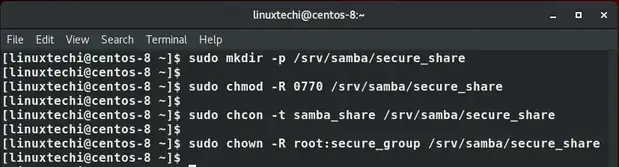
Next, we are going to create a new secure folder and later assign the necessary permissions and file ownership as shown below .
$ sudo mkdir -p /srv/samba/secure_share
$ sudo chmod -R 0770 /srv/samba/secure_share
$ sudo chcon -t samba_share -p /srv/samba/secure_share
$ sudo chown -R root:secure_group /srv/samba/secure_share
Next, we will assign the samba user a password that will be used when accessing the secured file share. This will prompt you to provide a SMP password and later confirm it.
$ sudo smbpasswd -a linuxuser

Now let’s head back to Samba’s configuration file
$ sudo vim /etc/samba/smb.conf
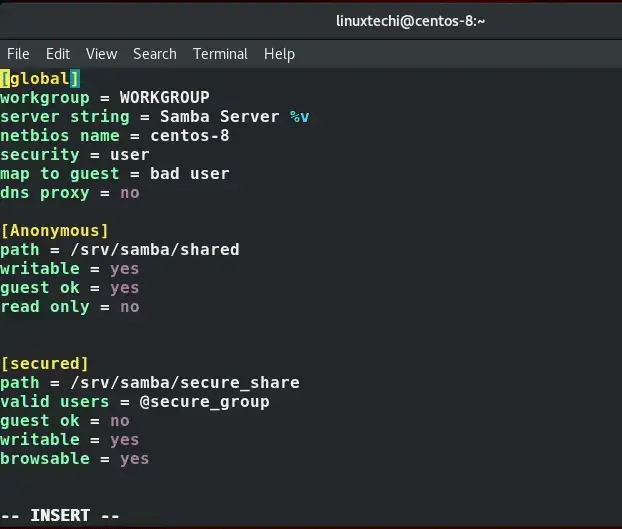
Append the config lines shown below:
[secured]
path = /srv/samba/secure_share
valid users = @secure_group
guest ok = no
writable = yes
browsable = yes
Save & exit and then restart Samba service
$ sudo systemctl restart samba
Accessing the Samba secure folder from a Windows System
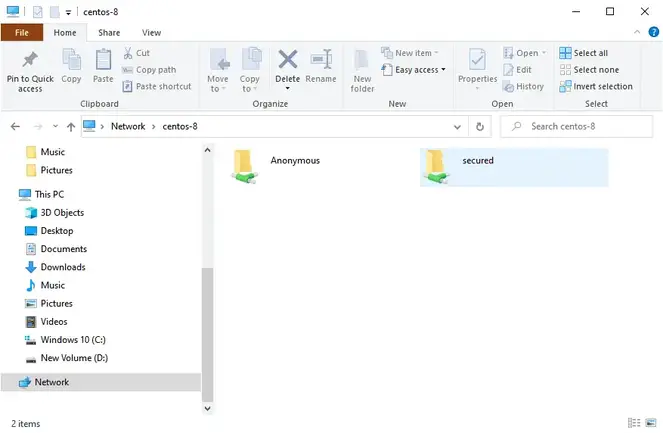
Again, to access Samba share from your windows system hit Windows Key + R to launch the ‘Run’ dialogue. Type \\hostname or \\ samba-IP and hit ENTER.
You’ll now notice that we have another folder called secured.
To access it, double click on it and a login pop-up will prompt you for your username and password credentials.
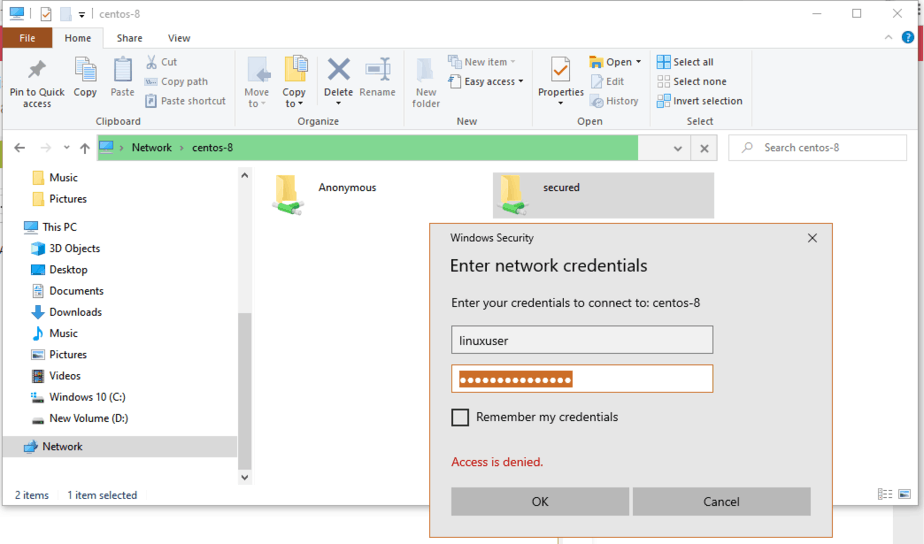
Once done, click on the ‘OK’ button or simply hit ENTER to access the contents of the folder

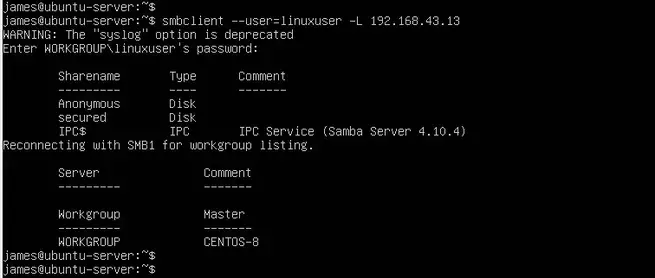
Accessing the Samba secure folder from a Linux machine
To access the shared directories from a Linux system, simply run the command:
$ smbclient --user=linuxuser -L //192.168.43.13
Provide the password when prompted and hit ENTER
To access the secure share run
$ smbclient //192.168.43.13/secured -U linuxuser
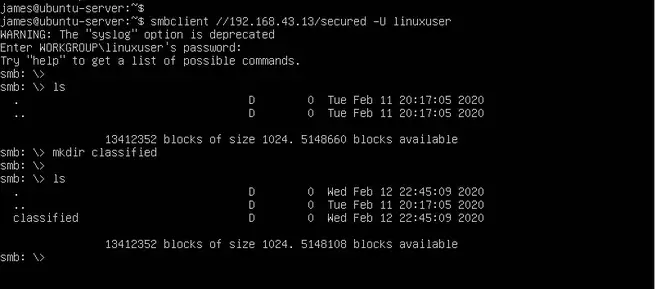
Feel free to create files and directories to share with other samba users.
Source: https://www.linuxtechi.com/install-configure-samba-centos-8/