How to Install Samba Server on CentOS 8
Samba is a free and open-source software that can be used to share files, folders, and printers between Linux and Windows systems. It is also used for Authentication and Authorization, Name resolution and Service announcement. It can be run on different operating systems including, Linux, Unix, OpenVMS and many more.
In this tutorial, we will learn how to install Samba and configure it as a standalone sharing server on CentOS 8.
This tutorial exists for these OS versions
Prerequisites
- A server running CentOS 8.
- A root password is configured on your server.
Install Samba Server
By default, the Samba package is available in the CentOS default repository. You can install it with the following command:
dnf install samba samba-common samba-client -yAfter installing Samba, start the SMB service and enable it to start after system reboot with the following command:
systemctl start smb
 systemctl enable smb
You can now verify the Samba service with the following command:
systemctl status smbYou should get the following output:
? smb.service - Samba SMB Daemon
   Loaded: loaded (/usr/lib/systemd/system/smb.service; disabled; vendor preset: disabled)
   Active: active (running) since Mon 2020-03-02 23:03:30 EST; 8s ago
     Docs: man:smbd(8)
           man:samba(7)
           man:smb.conf(5)
 Main PID: 2072 (smbd)
   Status: "smbd: ready to serve connections..."
    Tasks: 4 (limit: 25028)
   Memory: 33.8M
   CGroup: /system.slice/smb.service
           ??2072 /usr/sbin/smbd --foreground --no-process-group
           ??2074 /usr/sbin/smbd --foreground --no-process-group
           ??2075 /usr/sbin/smbd --foreground --no-process-group
           ??2076 /usr/sbin/smbd --foreground --no-process-group
Create a Public Share with Samba
In this section, we will create a public share with Samba so everyone can access the public share directory without a password.
Create a Public Share Directory
First, create a shared folder named public and also create two files inside the public directory:
mkdir -p /samba/share/public
 touch /samba/share/public/file1.txt
 touch /samba/share/public/file2.txt
Next, assign the necessary permissions and ownership with the following command:
chmod -R 0755 /samba/share/
 chmod -R 0755 /samba/share/public
 chown -R nobody:nobody /samba/share
 chown -R nobody:nobody /samba/share/public
Configure Samba
Next, you will need to configure Samba to share a public directory.
First, create a backup copy of /etc/samba/smb.conf file with the following command:
mv /etc/samba/smb.conf /etc/samba/smb.bakNext, create a new Samba configuration file:
nano /etc/samba/smb.confAdd the following lines:
[global]
workgroup = WORKGROUP
server string = Samba Server %v
netbios name = samba-server
security = user
map to guest = bad user
dns proxy = no

[Public]
path = /samba/share/public
browsable =yes
writable = yes
guest ok = yes
read only = no
Save and close the file. Then, restart Samba service to apply the changes:
systemctl restart smbNext, test the Samba configuration with the following command:
testparmYou should see the following output:
Load smb config files from /etc/samba/smb.conf
Loaded services file OK.
Server role: ROLE_STANDALONE

Press enter to see a dump of your service definitions

# Global parameters
[global]
	dns proxy = No
	map to guest = Bad User
	netbios name = SAMBA-SERVER
	security = USER
	server string = Samba Server %v
	idmap config * : backend = tdb


[Public]
	guest ok = Yes
	path = /samba/share/public
	read only = No
Configure SELinux and Firewall
Next, set the proper SELinux boolean and security context values on share directory with the following command:
setsebool -P samba_export_all_ro=1 samba_export_all_rw=1
semanage fcontext -a -t samba_share_t "/samba/share/public(/.*)?"
restorecon /samba/share/public
Next, all Samba service through firewalld with the following command:
firewall-cmd --add-service=samba --zone=public --permanent
 firewall-cmd --reload
Access Samba Share from Ubuntu Gnome
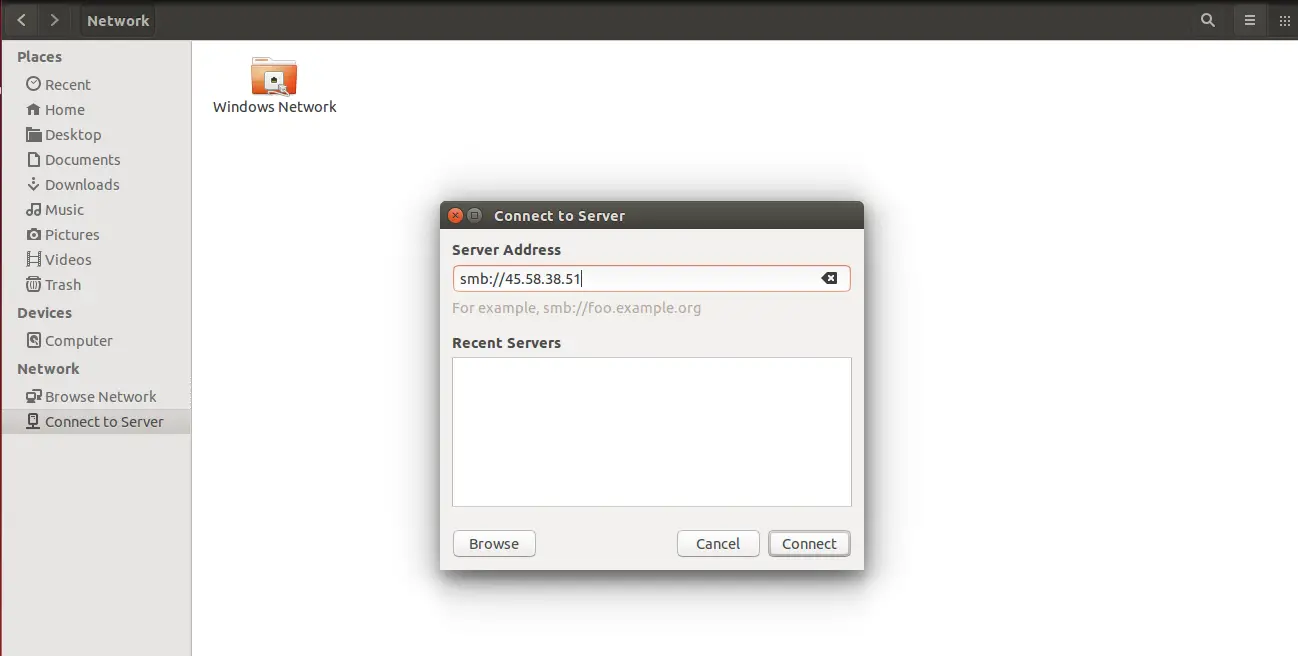
To access the Samba share, go to the remote machine, open the Gnome file manager and click on the Connect to Server as shown below:

Provide your Samba server IP address and click on the Connect button. After successfull connection, you should see the Samba share in the following screen:
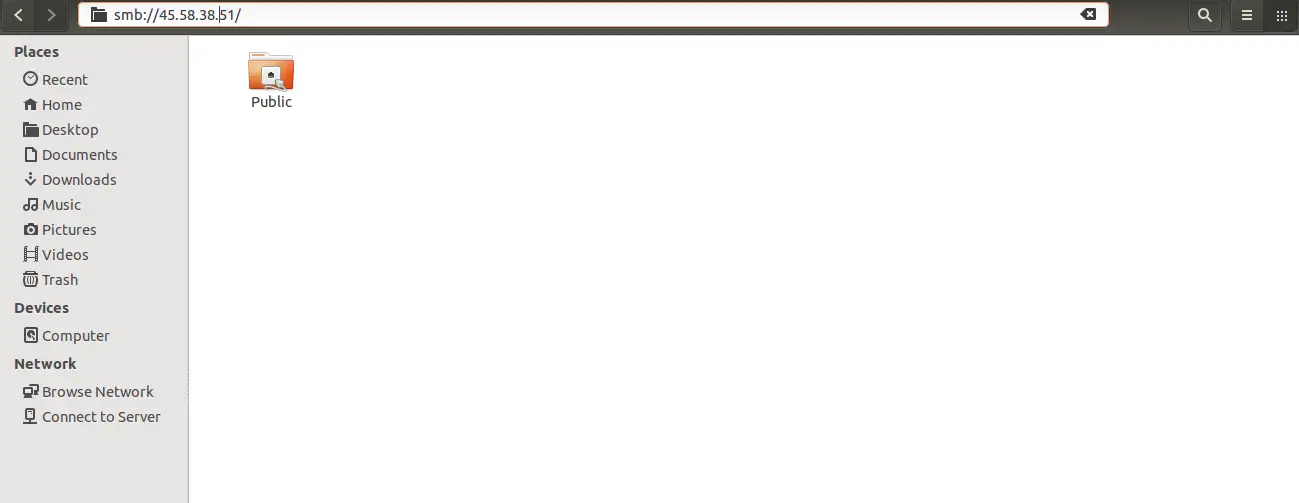
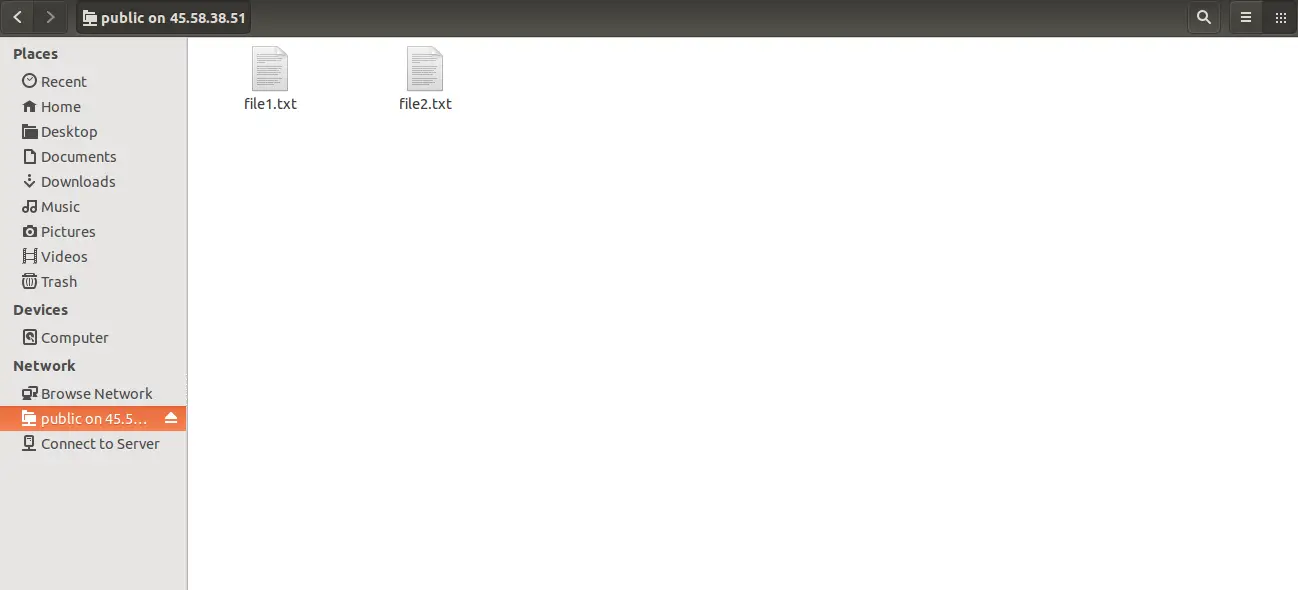
Now, click on the Public directory, you should see your files in the following screen:
Access Samba Share from Ubuntu Command-line
You can also access the Samba share from the command-line.Advertisement
First, list all available Samba share with the following command:
smbclient -L //45.58.38.51You should see the following output:
Domain=[WORKGROUP] OS=[Windows 6.1] Server=[Samba 4.10.4]

	Sharename       Type      Comment
	---------       ----      -------
	Public          Disk
	IPC$            IPC       IPC Service (Samba Server 4.10.4)
Domain=[WORKGROUP] OS=[Windows 6.1] Server=[Samba 4.10.4]

	Server               Comment
	---------            -------

	Workgroup            Master
	---------            -------
You can also mount the Samba share using cifs protocol. To do so, install cifs-utils package with the following command:
apt-get install cifs-utils -yNext, mount the Samba share to the /mnt directory with the following command:
mount -t cifs //45.58.38.51/public /mnt/You will be asked to provide password as shown below:
Password for root@//45.58.38.51/public:
Just press the Enter without entering any password to mount the Samba share:
You can now access the Samba share in /mnt direcotry:
ls /mnt/You should see the following output:
file1.txt file2.txt
Create Private Share with Samba
In this section we will create a private share with Samba so only authenticate user can access the private share directory.
Create User and Group
First, create a group named private with the following command:
groupadd privateNext, create a new user named privateuser and add it to the private group:
useradd -g private privateuserNext, set password for the user with the following command:
smbpasswd -a privateuserOutput:
New SMB password:
Retype new SMB password:
Added user privateuser.
Create a Private Share Directory
Next, create a shared folder named private and also create two files inside private directory:
mkdir -p /samba/share/private
 touch /samba/share/private/private1.txt
 touch /samba/share/private/private2.txt
Next, assign proper permission and ownership with the following command:
chmod -R 0770 /samba/share/private
 chown -R root:private /samba/share/private
Next, configure SELinux context for private directory with the following command:
semanage fcontext –at samba_share_t "/samba/share/private(/.*)?"
 restorecon /samba/share/private
Configure Samba
Next, open the Samba configuration file and define the private share:
nano /etc/samba/smb.confAdd the following lines at the end of the file:
[Private]
path = /samba/share/private
valid users = @private
guest ok = no
writable = yes
browsable = yes
Save and close the file then restart the Samba service to apply the changes:
systemctl restart smbNext, check the Samba configuration with the following command:
testparmYou should see the following output:
Load smb config files from /etc/samba/smb.conf
Loaded services file OK.
Server role: ROLE_STANDALONE

Press enter to see a dump of your service definitions

# Global parameters
[global]
	dns proxy = No
	map to guest = Bad User
	netbios name = SAMBA-SERVER
	security = USER
	server string = Samba Server %v
	idmap config * : backend = tdb


[Public]
	guest ok = Yes
	path = /samba/share/public
	read only = No


[Private]
	path = /samba/share/private
	read only = No
	valid users = @private
Access Samba Share from Ubuntu Command-line
First, access the available share with the following command:
smbclient -L //45.58.38.51You should see the following output:
Domain=[WORKGROUP] OS=[Windows 6.1] Server=[Samba 4.10.4]

	Sharename       Type      Comment
	---------       ----      -------
	Public          Disk
	Private         Disk
	IPC$            IPC       IPC Service (Samba Server 4.10.4)
Domain=[WORKGROUP] OS=[Windows 6.1] Server=[Samba 4.10.4]

	Server               Comment
	---------            -------

	Workgroup            Master
	---------            -------
Next, connect to Samba server and list the available share with the following command:
smbclient //45.58.38.51/private -U privateuserYou will be asked to provide a password as shown below:
Enter privateuser's password:
Type your password and hit Enter to access the Samba shell as shown below:
Domain=[WORKGROUP] OS=[Windows 6.1] Server=[Samba 4.10.4]
smb: \>
Now, list the available share with the following command:
smb: \> lsYou should see the following output:
.                                   D        0  Tue Mar  3 10:03:22 2020
  ..                                  D        0  Tue Mar  3 10:01:56 2020
  private1.txt                        N        0  Tue Mar  3 10:03:17 2020
  private2.txt                        N        0  Tue Mar  3 10:03:22 2020

		51194 blocks of size 2097152. 49358 blocks available
Now, exit from the Samba shell with the folowing command:
smb: \>exitYou can also mount the Samba share on /opt directory:
mount -t cifs -o user=privateuser //45.58.38.51/private /optYou will be asked to provide a password as shown below:
Password for privateuser@//45.58.38.51/private: *********
Provide your password and hit Enter to mount the Samba share.
You can now check your Samba share in /opt directory as shown below:
ls /opt/Output:
private1.txt private2.txt
Access Samba Share from Ubuntu Gnome
To access the Samba share, go to the remote machine, open the Gnome file manager and click on the Connect to Server as shown below:
Provide your Samba server IP address and click on the Connect button. After a successful connection, you should see the Samba share in the following screen:
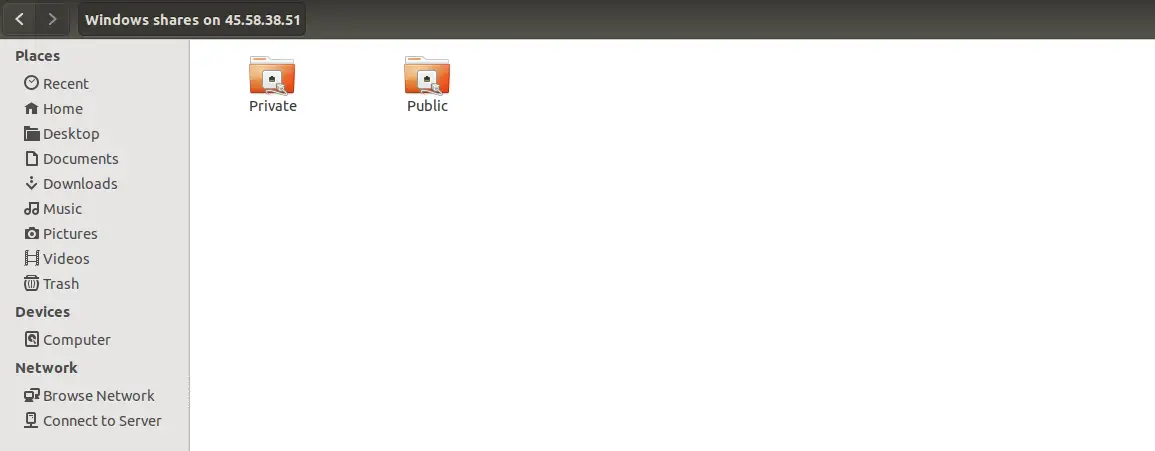
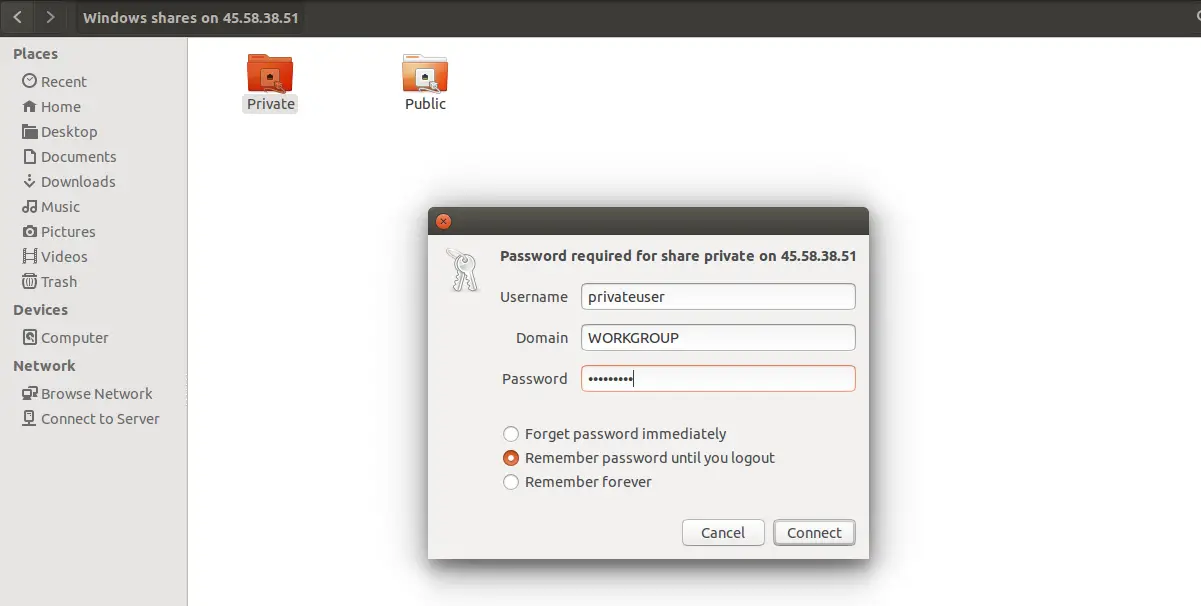
Now, click on the Private directory, provide your username and password, then click on the Connect button. You should see your files in the following screen:

Congratulations! you have successfully installed and configured Samba server on CentOS 8.
Source: https://www.howtoforge.com/how-to-install-samba-server-on-centos-8/