MRTG – Monitorování síťového provozu
http://www.youtube.com/watch?v=CXXl306MwE0
http://www.assemblein.info/system-center/how-to-install-and-configure-mrtg-on-linux-centos-5/
Multi Router Traffic Grapher (MRTG) je nástroj pro monitorování dopravní zátěže na síťových spojení.Generuje HTML stránky s PNG obrázky, které LIVE vizuální reprezentaci tohoto provozu. MRTG je napsán v Perlu a je dodáván s plným zdrojovým kódem.
V tomto článku se budeme procházet instalací MRTG na systému CentOS sledovat síťový provoz na routeru. Zde serveru ‚192 .168.1.59 „je webový server spuštěn CentOS5, kde je potřeba nainstalovat MRTG pro monitorování provozu a ‚192 ‚.168.1.254 je router pro provoz v síti, která je třeba sledovat.

Krok 1: Instalace MRTG na webovém serveru ‚192 .168.1.59 „
CentOS poskytuje MRTG balíček, který lze nainstalovat pomocí yum.
yum install mrtg
Krok 2: Konfigurace MRTG
Dále musíme nastavit MRTG pro monitorování síťového zařízení. To se provádí vytvořením mrtg.cfg soubor, který definuje, co chcete sledovat. MRTG poskytuje binární „cfgmaker“ automaticky vytvoří konfigurační soubor „mrtg.cfg“.
/ Usr / bin / cfgmaker globálnímu „Workdir: / var / www / html / mymrtg“ vsnl@192.168.1.254 výstup / etc / mrtg / mrtg.cfg
Tento příkaz vytvoří na MRTG konfiguračním souboru ‚/ etc / mrtg / mrtg.cfg „a nastaví“ Workdir „(což je / var / www / html / mymrtg zde) skladovat MRTG grafů. Adresáře ‚/ var / www / html „je výchozí dokument kořen tohoto WWW serveru. „VSNL“ je pouze pro čtení komunity název zařízení, které chcete vytvořit konfiguraci. Pokud používáte nesprávný název komunity budete mít žádnou odezvu od zařízení.‚192 .168.1.254 „Je IP adresa SNMP ovladatelné zařízení (Toto nastavení by mělo být provedeno v routeru kterých budeme hovořit později).
Krok 3: Spuštění MRTG
Po vytvoření konfiguračního souboru, můžete spustit MRTG MRTG grafy vytvořit poprvé.
/ Usr / bin / mrtg / etc / mrtg / mrtg.cfg
To bude dotaz router, a také vytvořit první grafy MRTG dopravy a webových stránek. Při spuštění mrtg poprvé, tam bude spousta stížností na chybějící soubory protokolu, které můžete bez obav ignorovat.
Krok 4: Vytvoření indexový soubor pro mrtg získat přístup pomocí prohlížeče
Spustil „indexmaker“ příkaz k vytvoření indexu souboru.
/ Usr / bin / indexmaker výstup index.html / etc / mrtg / mrtg.cfg
Krok 5: Přidání cronu pravidelně spouštět mrtg
Upravte crontab pomocí „crontab-e“ a přidejte následující cron.
* / 5 **** usr / bin / mrtg / etc / mrtg / mrtg.cfg protokolování / var / log / mrtg.log
Router Side konfigurace
Krok 1: Ověřte SNMP je nainstalován a spuštěn
CentOS obsahuje snmp balík pro instalaci, který může být instalován pomocí yum.
yum install net-snmp net-snmp-utils
Krok 2: Konfigurace snmpd
Aby MRTG k hlasování informací z routeru (nebo server), musíme nastavit jen pro čtení (veřejné) společenství na routeru. Za tímto účelem je třeba upravit konfigurační soubor ‚/ etc / SNMP / snmpd.conf „s následujícím obsahem.
rocommunity VSNL
rozhraní eth0
agentaddress 192.168.1.254:161
Nyní restartujte snmpd.
chkconfig snmpd na
služby snmpd restartu
Konfigurace část je doplněna. Nyní budete moci sledovat síťový provoz pomocí odkazu
http://192.168.1.59/mymrtg/
Vzorek grafu lze vidět takto.

MRTG graf
http://www.cyberciti.biz/faq/centos-fedora-linux-multi-router-traffic-grapher-tutorial/
Centos Install and Configure MRTG
How do I install and configure MRTG under Fedora Linux or CentOS Linux v5.x server to monitor the traffic load on network-links including routers?
The Multi Router Traffic Grapher (MRTG) is a tool to monitor the traffic load on network-links.
MRTG generates HTML pages containing PNG images which provide a LIVE visual representation of this traffic. You need the following packages:
- mrtg : Multi Router Traffic Grapher
- net-snmp and net-snmp-utils : SNMP (Simple Network Management Protocol) is a protocol used for network management. The NET-SNMP project includes various SNMP tools. net-snmp package contains the snmpd and snmptrapd daemons, documentation, etc. You also want to install the net-snmp-utils package, which contains NET-SNMP utilities.
This FAQ works with RHEL / CentOS and Fedora Linux.
Step # 1: Install MRTG
Type the following command to install packages using yum command under CentOS / Fedora Linux:
# yum install mrtg net-snmp net-snmp-utils
Step # 2: Configure snmpd
If you need to monitor localhost including interface and other stuff such as CPU, memory etc, configure snmpd. Open /etc/snmp/snmpd.conf, enter:
# vi /etc/snmp/snmpd.conf
Update it as follows to only allow access from localhost:
com2sec local localhost public group MyRWGroup v1 local group MyRWGroup v2c local group MyRWGroup usm local view all included .1 80 access MyRWGroup "" any noauth exact all all none syslocation VSNL, India syscontact Root
Save and close the file. Restart snmpd:
# chkconfig snmpd on
 # service snmpd restart
Make sure you see interface IP, by running the following command:
# snmpwalk -v 1 -c public localhost IP-MIB::ipAdEntIfIndex
Sample Outputs:
IP-MIB::ipAdEntIfIndex.123.xx.yy.zzz = INTEGER: 2 IP-MIB::ipAdEntIfIndex.127.0.0.1 = INTEGER: 1
Step # 3: Configure MRTG
Use cfgmaker command to creates /etc/mrtg/mrtg.cfg file, enter:
# cfgmaker --global 'WorkDir: /var/www/mrtg' --output /etc/mrtg/mrtg.cfg public@localhost
- –global ‚WorkDir: /var/www/mrtg‘ : add global config entries i.e. set workdir to store MRTG graphs.
- –output /etc/mrtg/mrtg.cfg: configr output filename
- public@localhost : public is the community name of the device you want to create a configuration for. If you are using the wrong community name you will get no response from the device. localhost is the DNS name or the IP number of an SNMP-managable device i.e. our local server.
Finally, run indexmaker to create web pages which display the status of an array of mrtg interface status pages:
# indexmaker --output=/var/www/mrtg/index.html /etc/mrtg/mrtg.cfg
Step # 4: Verify Cron Job
/etc/cron.d/mrtg runs mrtg command to monitor the traffic load on network links:
# cat /etc/cron.d/mrtg
Sample Output:
*/5 * * * * root LANG=C LC_ALL=C /usr/bin/mrtg /etc/mrtg/mrtg.cfg --lock-file /var/lock/mrtg/mrtg_l --confcache-file /var/lib/mrtg/mrtg.ok
Just make sure crond is running and you are done with configuration:
# chkconfig --list crond
If it is off in run level # 3, just run the following to turn on crond service:
# chkconfig crond on
 # service crond on
How do I view mrtg graphs?
You need Apache web server to view graphs, simply type the following to install httpd:
# yum install httpd
 # chkconfig httpd on
 # service httpd on
Fire a webbrowser and type the url:
http://your-ip.add.ress/mrtg/
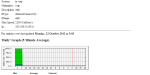
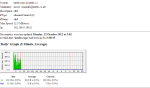
http://192.168.1.5/mrtg/

Fig.01:Sample MRTG Graph
How Do I Create MRTG For My Router at 192.168.1.254?
Run cfgmaker as follows (there is no need to configure snmp for router, as most router and switches comes pre configured with their own SNMPD):
# cfgmaker --global 'WorkDir: /var/www/mrtg' --output /etc/mrtg/mrtg.cfg public@router
OR
# cfgmaker --global 'WorkDir: /var/www/mrtg' --output /etc/mrtg/mrtg.cfg public@192.168.1.254
How Do I Password Protect My Graphs?
Read this FAQ: Set Apache Password Protected Directories With .htaccess File.
See Also:
—————
http://wiki.centos.org/TipsAndTricks/MRTG
Getting Started With MRTG on CentOS 5
This guide will you get started with MRTG on CentOS 5. It is by no means a complete reference. A complete reference can be obtained from Tobi Oetiker’s website.
Installation
Install MRTG
yum -y install mrtg
Optionally install snmpwalk and snmpget
yum -y install net-snmp-utils
MIBs & OIDs
Before going any further with this you will need to gather some information from your devices. You may have to obtain a MIB for your device and or do some research to figure out which OID’s to use. The snmpget and snmpwalk commands will help as well.
Configuration Files
The MRTG package will create a sample configuration file, crontab file, and Apache configuration file.
/etc/mrtg/mrtg.cfg /etc/cron.d/mrtg /etc/httpd/conf.d/mrtg.conf
/etc/mrtg/mrtg.cfg – Initial Sample
Once you have the OID information you can begin editing your mrtg.cfg file. Simply uncomment the lines and modify them to point to the device you are monitoring. The default file has a sample host to get you started.
HtmlDir: /var/www/mrtg ImageDir: /var/www/mrtg LogDir: /var/lib/mrtg ThreshDir: /var/lib/mrtg #Target[r1]: 2:public@myrouter.somplace.edu #MaxBytes[r1]: 1250000 #Title[r1]: Traffic Analysis #PageTop[r1]:Stats for our Ethernet
/etc/mrtg/mrtg.cfg – Extended Sample
Here is an extended sample mrtg.cfg that will gather the port throughput on a Linksys router running DD-WRT. In this example the maxbytes field has been changed to a global setting by using the underscore. Additional global options are defined so that graph grows from the right and displays bits instead of bytes. Each port is configured as a separate target. The input and output OIDs are specified using their symbolic names, followed by the community string and management IP address.
HtmlDir: /var/www/mrtg ImageDir: /var/www/mrtg LogDir: /var/lib/mrtg ThreshDir: /var/lib/mrtg MaxBytes[_]: 1250000 Options[_]: growright, bits Target[Linksys_Port_1]: ifInOctets.1&ifOutOctets.1:public@192.168.0.9 Title[Linksys_Port_1]: Linksys Port 1 Throughput PageTop[Linksys_Port_1]:Linksys Port 1 Throughput
Target[Linksys_Port_2]: ifInOctets.2&ifOutOctets.2:public@192.168.0.9 Title[Linksys_Port_2]: Linksys Port 2 Throughput PageTop[Linksys_Port_2]:Linksys Port 2 Throughput
Target[Linksys_Port_3]: ifInOctets.3&ifOutOctets.3:public@192.168.0.9 Title[Linksys_Port_3]: Linksys Port 3 Throughput PageTop[Linksys_Port_3]:Linksys Port 3 Throughput
Target[Linksys_Port_4]: ifInOctets.4&ifOutOctets.4:public@192.168.0.9 Title[Linksys_Port_4]: Linksys Port 4 Throughput PageTop[Linksys_Port_4]:Linksys Port 4 Throughput
Target[Linksys_Port_5]: ifInOctets.5&ifOutOctets.5:public@192.168.0.9 Title[Linksys_Port_5]: Linksys Port 5 Throughput PageTop[Linksys_Port_5]:Linksys Port 5 Throughput
Target[Linksys_Port_6]: ifInOctets.6&ifOutOctets.6:public@192.168.0.9 Title[Linksys_Port_6]: Linksys Port 6 Throughput PageTop[Linksys_Port_6]:Linksys Port 6 Throughput
Target[Linksys_Port_7]: ifInOctets.7&ifOutOctets.7:public@192.168.0.9 Title[Linksys_Port_7]: Linksys Port 7 Throughput PageTop[Linksys_Port_7]:Linksys Port 7 Throughput
/etc/mrtf/mrtg.cfg – Using cfgmaker
It is also possible to have MRTG automatically build a configuration file for your device.
cfgmaker public@192.168.0.9 > /etc/mrtg/mrtg.conf
/etc/cron.d/mrtg
After the configuration has been saved MRTG will start building the rrdtool log files and basic HTML pages. You can run the poller commands manually if you’re impatient or you want to troubleshoot.
export LANG=C export LC_ALL=C /usr/bin/mrtg /etc/mrtg/mrtg.cfg --lock-file /var/lock/mrtg/mrtg_l --confcache-file /var/lib/mrtg/mrtg.ok
/etc/httpd/conf.d/mrtg.conf – Apache Configuration
After several minutes pull up your site in your favorite browser. http://www.example.com/mrtg/linksys_port_1.html
By default the MRTG Apache configuration will only allow localhost to view the URL. If you need to access the URL from another machine just modify the MRTG Apache configuration file and restart Apache. This example only has the Alias definition.
/etc/httpd/conf.d/mrtg.conf
Alias /mrtg /var/www/mrtg ## Order deny,allow # Deny from all # Allow from 127.0.0.1 # Allow from ::1 # # Allow from .example.com #
Restart Apache after making the change.
service httpd restart
Creating The Index Page
There will be no index.html. You can use indexmaker to create this. Either add this to the crontab or just run it whenever you make changes to your mrtg.cfg.
indexmaker --output=/var/www/mrtg/index.html /etc/mrtg/mrtg.cfg
Now you should be able to pull up http://www.example.com/mrtg in your favorite browser to view the graphs.
Links
http://www.root.cz/n/mrtg/clanky/
MRTG – grafické prehľady (8)
 V minulých častiach sme si ukázali praktické príklady použitia mrtg pre monitoring šírky využitého pásma, dobu odozvy, vyťaženie sql servera, prehľad trafficu na jednotlivých rozhraniach, dnes si ukážeme využitie pre spracovanie prehľadu packetových výpadkov pri ICMP_ECHO a vyťaženie modemového poolu.
MRTG – grafické prehľady (7)
Dnes si ukážeme, ako možno MRTG využiť pre jednoduché monitorovanie dostupnosti a časovej odozvy pri komunikácii s rôznymi hostami v lokálnej sieti. Pri menej spoľahlivých prepojoch, ako napríklad mikrovlnných alebo pri hľadaní chýb nás môže zaujímať dĺžka odozvy v jednotlivých častiach dňa. Takýchto monitorovacích softwarov exituje neúrekom, prečo si však takúto implementáciu nevytvoriť priamo v MRTG, keď majú pre nás iba informatívny charakter a ich cieľom nie je oznamovanie výkyvov.MRTG – grafické prehľady (6)
Po vydaní prvých piatich dieloch miniseriálu o MRTG som dostal množstvo dotazov a ohlasov týkajúcich sa tejto problematiky, hlavne týkajúcich sa praktických príkladov využitia v praxi. Takže v ďalších častiach si poukazujeme ďalšie praktické príklady využitia mrtg ako nástroja pre grafické stvárnenie dát v časovom rade. Dnes sa budeme venovať tvorbe grafov o trafficu zariadení, ktoré možnosťou SNMP neoplývajú, alebo nemáme možnosť k nim pristúpiť za účelom inštalácie tejto služby.MRTG – grafické prehľady (5)
V minulej časti miniseriálu o MRTG sme si ukázali, že prostredníctvom mrtg môžeme monitorovať ľubovoľné veličiny, nie iba traffic na sieťových rozhraniach. Dnes si ukážeme ďalšie dva zaujímavé príklady praktického monitorovania a to prehľad o vyťažení mysql servera prostredníctvom užívateľského skriptu a sledovanie prevádzky na Squid proxy prostredníctvom snmp.MRTG – grafické prehľady (4)
V minulých častiach miniseriálu o MRTG sme si čo to povedali o inštalácii a konfigurovaní tohoto nástroja pre sledovanie trafficu, dnes si ukážeme na pár príkladoch, ako môžeme spracovávať ľubovoľné dáta v časovom rade.MRTG – grafické prehľady (3)
V minulej časti miniseriálu sme si ukázali, ako definujeme jednotlivé ciele programu mrtg. Dnes si ukážeme, ako jednotlivými voľbami môžeme ovplyvniť tvorbu grafov. Hor sa teda na ne.MRTG – grafické prehľady (2)
V dnešnej časti miniseriálu o MRTG si priblížime skript indexmaker a jednotlivé voľby konfiguračných súborov mrtg.