Záznam dění na desktopu
http://www.abclinuxu.cz/blog/omzul/2008/8/zaznam-deskopu-a-google-video-ci-youtube
http://www.linuxhaxor.net/2008/05/20/5-ways-to-screencast-your-linux-desktop/
Záznam deskopu a Google Video či YouTube
27.8. 16:10 | Přečteno: 931× | Linux | poslední úprava: 27.8. 16:10
V duchu otřepaného: „Jednou viděné je lepší než..“ jsem se rozhodl, že vyzkouším možnosti YouTube (YT) a Google Video (GV) v kombinaci se záznamem dění na pracovní ploše. No, to jsem si dal  . Výsledek není žádná sláva, nalezené informace byly často rozporuplné, tudíž vyvstala spousta otázek. Neb i nadále vidím budoucnost v aluminiu teda videu, rozhodl jsem se podělit o své postřehy. Třeba se tu najdou souvěrci a společným úsilím se to podaří dotáhnout do použitelného stavu (blog Abíčko na tohle možná není ideální nástroj => víte-li někdo o lepší cestě..
  )
)
Otázkou je vůbec vhodnost googlího webového prostoru s max rozlišení videa 640×480(?). Za klad považuji:
- free + dostatečně známý a zabydlený
- umožňuje popis videa (YT pomocí Annotations, GV titulky)
- u GV se mi líbí možnost „neveřejného“ videa (= vyhledávač jej nevrátí x stačí rozeslat link). YT má možnost privátních videí (nepovedlo se mi vyzkoušet a navíc má limit 25 osob a možná musí být registrování uživatelé YT(?))
- + spousta vychytávek, ale ty mi teď nepřijdou tak podstatné
Pokud zůstaneme u Google, pak nastane problém, jaké parametry má mít upload, aby byl výsledek co nejlepší. V tom se mi opravdu nedařilo, navíc se těžce ztrácím v pojmech (obálka, formát, kodek, jak to souvisí s příponou..). Na základě těchto
český přepis videa pro YT
údaje pro GV
a dalších zdrojů usuzuji, že důležitými parametry jsou formát(?), rozlišení (+poměr stran 4:3), Frame rate, Bit rate. Za ideál považuji, kdyby se podařilo zaznamenávat přímo v podobě, kterou by Google přebral tak jak je, ale to je asi naivní.
A poslední (či první?  ) problém je, jak záznam pořídit. K tomu na ABC vyšla pěkná zprávička. Ač jsem klikač, zakotvil jsem nakonec u ffmpeg, neb umožňuje velkou škálu nastavení výstupu. Jak jej přimět k nahrávání je popsáno zde (více man či dokumentace). K ostatním produktům si dovolím pár poznámek z pohledu uživatele openSUSE 11 64-bit s KDE4.1.x
- ffmpeg – u toho jsem zakotvil
- Istanbul – vzdal jsem, neb se mi pohádali závislosti (používám factory repozitář
 )
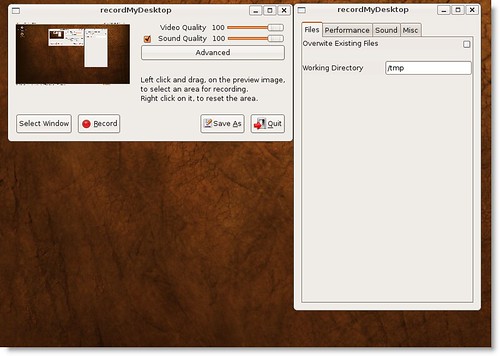
) - RecorMyDesktop – nelíbí se mi nastavování snímané oblasti + výstup mi nabízí pouze jako ogv či ogg (použito Qt GUI)
- vnc2swf – na ten nedošlo
- Wink – na 64bit řekl že nee

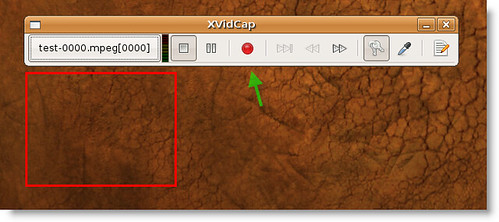
- Xvidcap – po několika vteřinách padal, když jsem se snažil zvednout Frame Rate z defaultních 10. Tak jsem jej použil pouze pro zjištění velikosti oblasti, ale na to bude určitě nějaký šikovnější nástroj.
Posledně jsem pro záznam videa jsem použil:
ffmpeg -f x11grab -b 1000 -r 25 -s 1024×768 -vtag XVID -i :0.0 ~/out.avi
Přímé přehrání nevypadalo špatně, ale už i to bylo trošku rozostřené . Na YT jsem to dostal s tímto výsledkem a na na GV se mi to nahrálo takto tj. žádná vyšší kvalita se nekonala.
Co se uploadu týče, no jo, no, žádný fofr to nebyl. Neumím si představit, kdybych měl něco většího x vím i o celovečerních pořadech, tak to asi možné je . Dle mého se to také nemá rádo s PROXY.
Pochopitelně spokojen nejsem a budu vděčný za každé uvedení na pravou míru, doplnění či jiný podnět. Předem díky.
5 Ways to Screencast Your Linux Desktop
By Pavs on May 20th, 2008
Here are five popular ways to capture desktop screencast for Linux
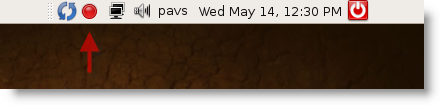
1) Istanbul: Istanbul is one of the more widely used desktop recording software out there. You can download Istanbul from here. Debian and Fedora users should be able to install it from the repo. Istanbul has a very simple interface (or lack of). When you first start up Istanbul, you will see a small red button on your desktop panel.
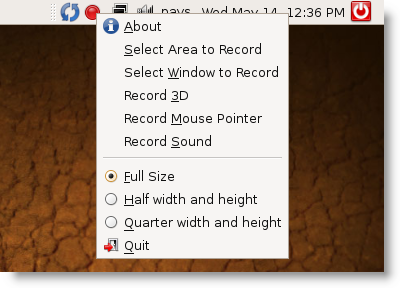
Right click on the button and it will give you options and ways to record you desktop by window you choose or desktop area you select by mouse.
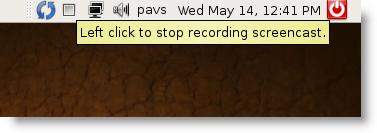
You can stop recording you session by left clicking on the record button, and it will prompt you save the screencast:
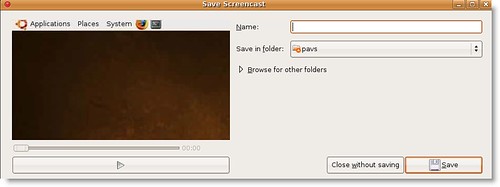
By default, Istanbul saves your video in Ogg format.
2) Wink: Wink gives you more control over you Screencast than any Linux screencast software I have tried, and the fact that it doesn’t actually takes videos in the conventional sense of taking videos of your desktop screen, it gives you more control over your video. Wink takes video by taking screenshots of your desktop in frames per second. If you set your Wink to take 20 frames per second and take one minute worth of screencast with wink, it will have roughly 1200 screenshots of your desktop in one minute, which you can edit one screenshot at a time giving you more control over the video. Wink saves the video in shockwave format which you can later convert into whatever format you wish to.
You can download wink from it’ website here.
Wink will not work with newer distros of Ubuntu 8.04, or any Linux distros with libexpat.so.1 file located in /usr/lib/. A temporary solution that worked for me was to simply rename the file to libexpat.so.0, even thoughI didn’t have any problem with my system after doing this and everything worked ok, it is not highly recommended as it might effect other program using this file. You can rename it back to it’s original format when you are done. A permanent solution would be to recompile the program and link it to the new libraries; or wait for it to be officially updated by the author.
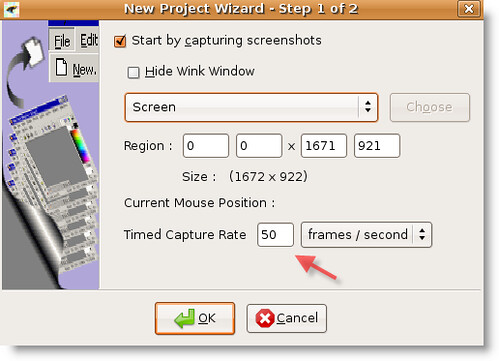
To start doing screencast with Wink, start a new project with File –> New, and select the screen size you would like to record.
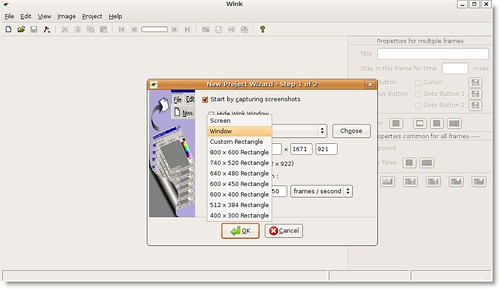
(click for larger view)
You will see that by default it capture 50 frames/second in Time capture Mode.
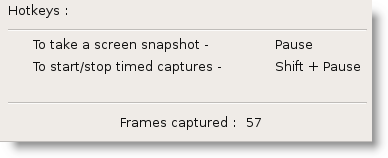
After selecting OK a window will pop up giving your shortcuts for video capture.

Select “Minimize To Tray”. From the desktop panel right click on the icon and select “Start Timed Capture”, to start capturing your desktop.

You can select “Stop Timed Capture” whenever you think you are done with your work. It will tell you how many frames have been captured.
To get your video you have to render all the image files into a video file. And now you have a video of your desktop.
Render Images:

Save file options:

3) Xvidcap: This is a nice little video capturing app that does the job, however for me it was a little too buggy for my liking. You can download xvidcap from here. When you start xvidcap, it will give you red square to work with, which represents the space that will be captured, you can drag the square to your liking, depending on how much you want to capture. To start capturing just click onthe red button. Other options including the ability to choose a screen area to capture and detach the frame area from the video capture selection. However if you select the whole desktop screen or large portion of the desktop screen, this will slow down your computer to a crawl.
4) vnc2swf: Another popular, but inconvenient, way to screencast desktop is to use vnc2swf to record desktop sessions. vnc2swf works by connecting to vncserver and recording sessions. Debian users can use this program by installing sudo apt-get install pyvnc2swf. Others can download from it’s website: http://www.unixuser.org/~euske/vnc2swf/
To start recording, assuming you have vnc server installed, just type this command in the terminal vnc2swf -o test.swf -N -S localhost:0 and it should pop up a simple window for recording purpose.
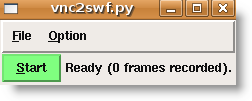
For more options check out the official documentation.
5) Recordmydesktop: Another fairly widely used desktop recording application which runs in command and has a graphical frontend, debian user can install both with apt-get, sudo apt-get install recordmydesktop gtk-recordmydesktop, others can download from their project page: http://sourceforge.net/projects/recordmydesktop. Recordmydesktop works the same way as Istanbul and has almost the same look and feel down to the desktop panel shortcut. But RMD has more advanced options that are missing in Istanbul. the options are self-explanatory and should be fairly easy to configure.
If you liked this article, please share it on del.icio.us, StumbleUpon or Digg. I’d appreciate it. 🙂