Synology a Cestovní profily: Přiřazení adresáře uživatele uživatelům služby Synology Directory Server (roaming profilu)
Některé články byly strojově přeloženy z angličtiny. Mohou obsahovat nepřesnosti nebo gramatické chyby. Snažíme se, aby vám naše články co nejvíce pomáhaly. Pod tímto článkem je prostor, kde nám můžete sdělit, jestli vám tyto informace pomohly. V pravém dolním rohu můžete rovněž přepnout na anglickou verzi a přečíst si původní text.
Pomocí roamingových profilů mohou uživatelé domény přistupovat ke svým souborům po přihlášení k libovolnému počítače v síti. Všechny uložené soubory, například ve složkách Plocha a Moje dokumenty, se uchovávají ve vzdálené sdílené složce. Uživatelé domény tak mohou používat stejné uživatelské prostředí při práci na různých počítačích.
Abyste mohli roamingový profil pro uživatele domény povolit, musíte pro adresář profilu nastavit umístění na serveru. Tento článek vás provede postupem přiřazení adresáře uživatele jednomu uživateli domény a všem uživatelům domény, aby měli povoleny roamingové profily.
Note:
- Synology Directory Server je aktualizovaná verze služby Active Directory Server, nikoli služby LDAP Server (dříve Directory Server).
Obsah
- Než začnete
- Přiřazení adresáře uživatele jednomu uživateli
- Přiřazení adresáře uživatele všem uživatelům
1. Než začnete
Než začnete s přiřazováním adresáře uživatele uživatelům domény, přesvědčte se, že máte nainstalovanou službu Synology Directory Server a že jste vytvořili sdílenou složku.
- Přejděte do Centra balíčků a nainstalujte službu Synology Directory Server.
- Připojte do domény počítače uživatelů.
- Přejděte do části DSM > Ovládací panel > Sdílená složka a vytvořte sdílenou složku.
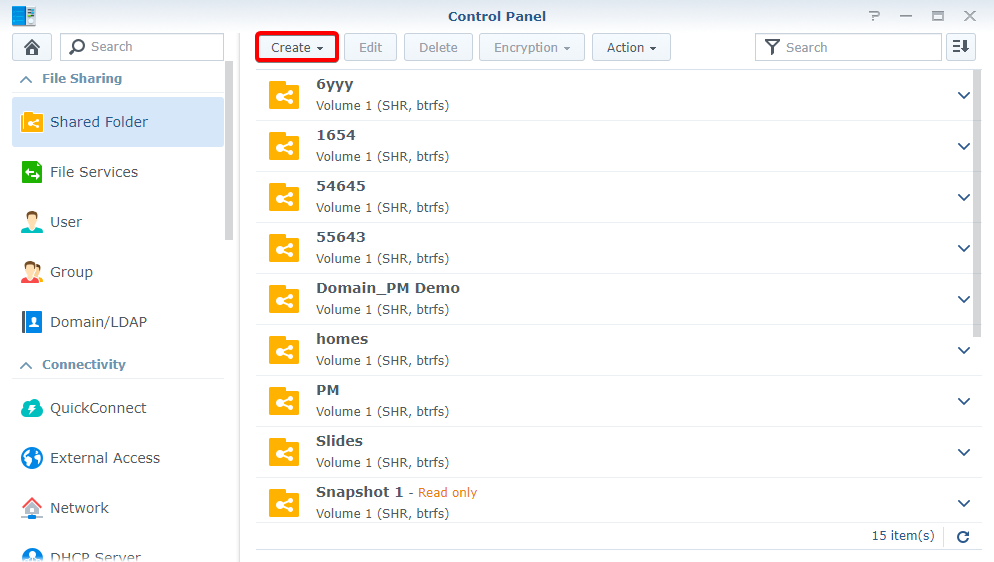
Poznámka:
- Sdílené složky pro jednoho uživatele nesmí být stejné jako sdílené složky pro všechny uživatele.
- Klikněte na vytvořenou sdílenou složku pravým tlačítkem a vyberte možnost Upravit.
- Na kartě Oprávnění vyberte možnost Uživatelé domény.
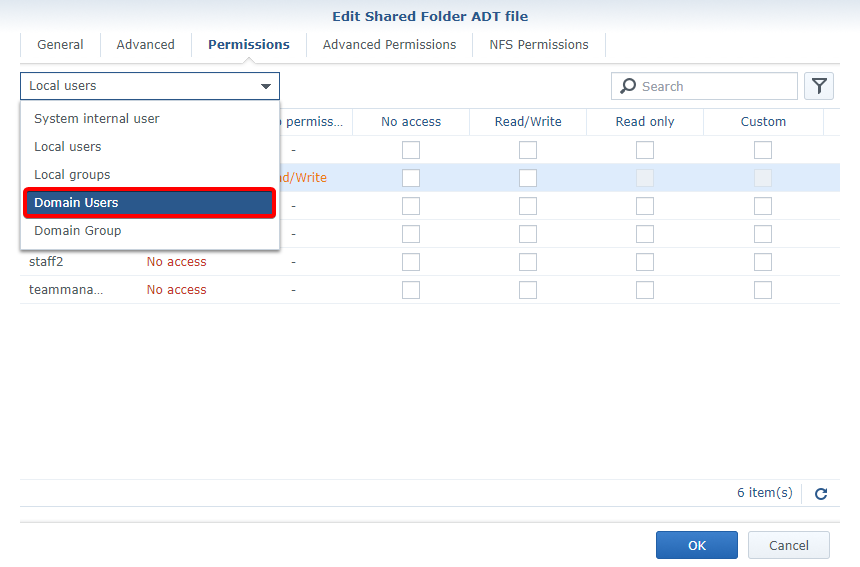
- Klikněte na zaškrtávací políčko Vlastní a zobrazí se okno Editor oprávnění. V rozevírací nabídce vyberte cílového uživatele nebo skupinu a podle nastavení v následující tabulce nastavte položky Použít pro a Oprávnění. Na následujícím obrázku vidíte ukázku nastavení oprávnění pro skupinu Vlastník.
Uživatel nebo skupina Použít pro Oprávnění Majitel Zaškrtněte možnosti Podřízené složky, Podřízené soubory a Všichni potomci Chcete-li získat kompletní kontrolu, zaškrtněte možnosti Správa, Čtení a Zápis Správci domény Vyberte možnost Vše Chcete-li získat kompletní kontrolu, zaškrtněte možnosti Správa, Čtení a Zápis Uživatelé domény Vyberte možnost Vše Chcete-li získat oprávnění ke čtení, zaškrtněte možnost Čtení a pod položkou Zápis pouze možnost Vytvářet složky / Připojovat data. 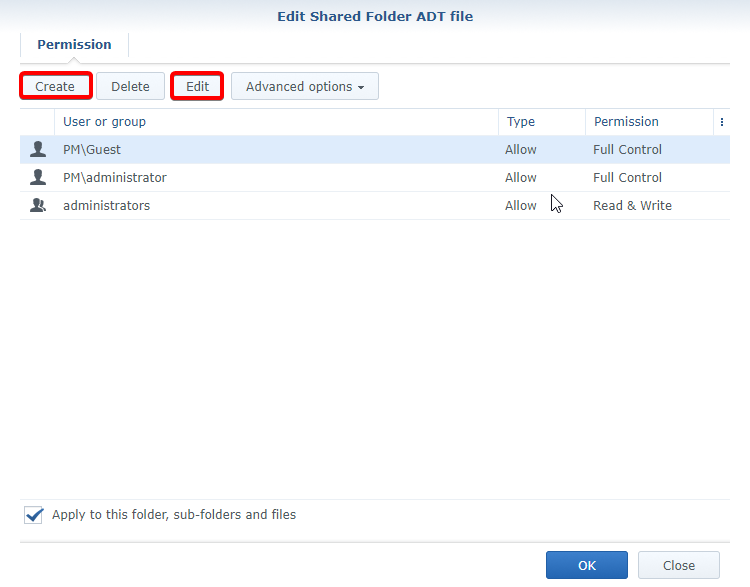

2. Přiřazení adresáře uživatele jednomu uživateli
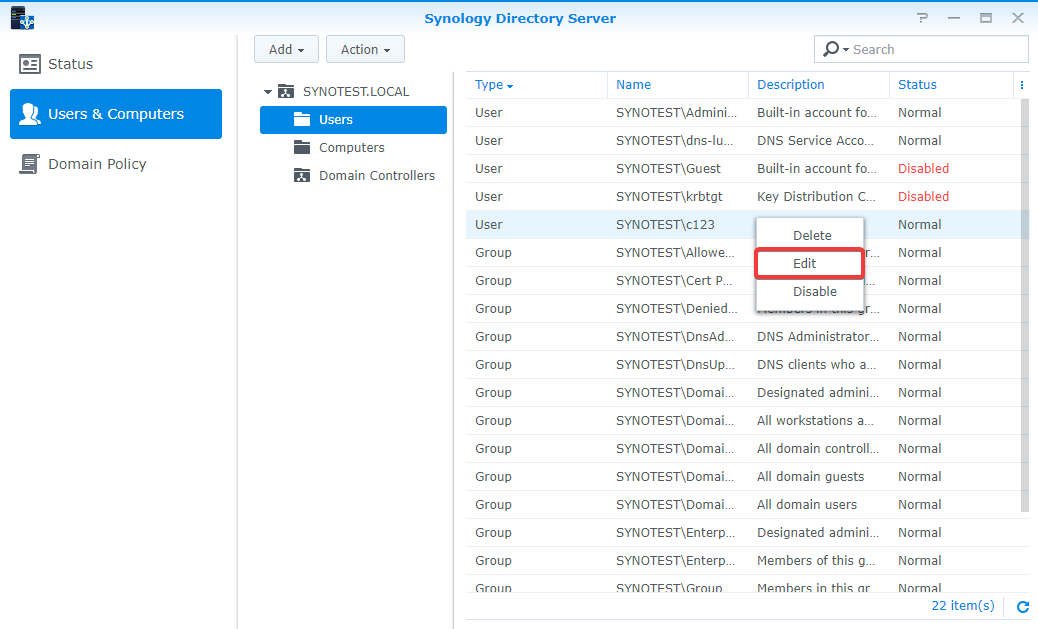
- Ve službě Synology Directory Server nakonfigurujte adresář uživatele.
- Přejděte do části Uživatelé a počítače > Uživatelé.
- Klikněte pravým tlačítkem na účet uživatele domény a vyberte možnost Upravit.
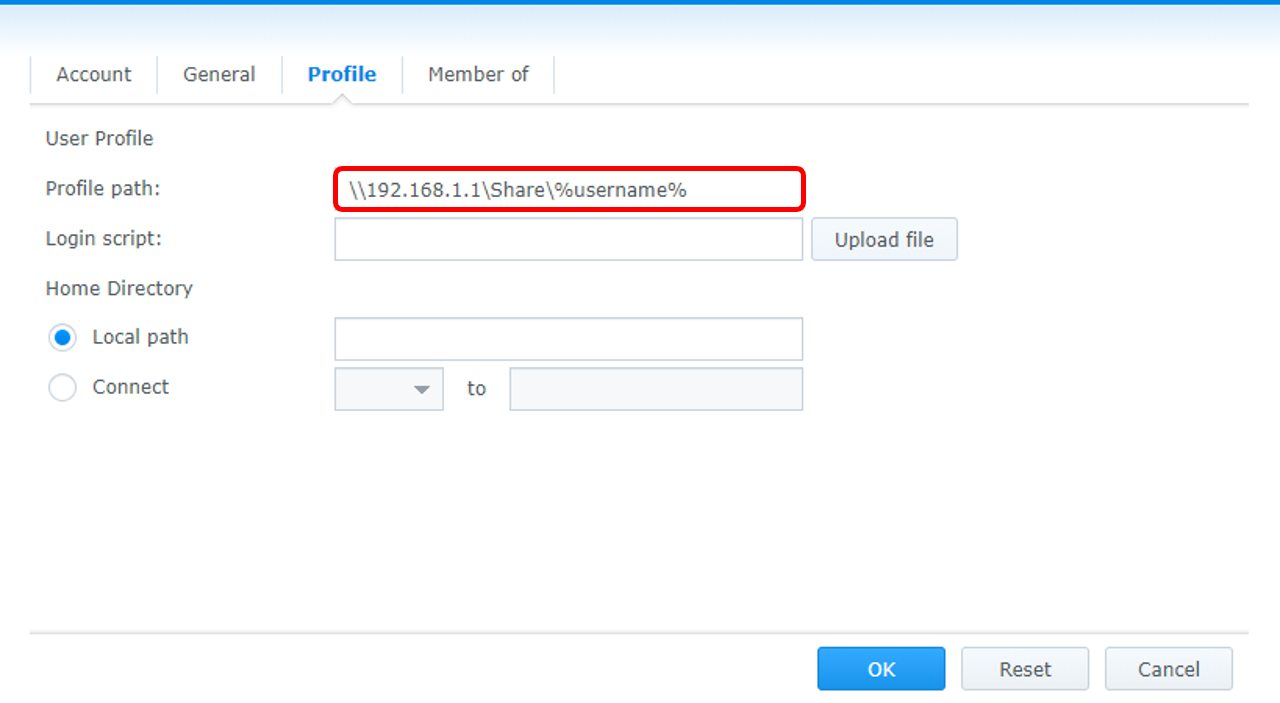
- Přejděte na kartu Profil, do pole Cesta k profilu zadejte cestu ke vzdálené sdílené složce a poté klikněte na možnost OK. Příklad: \\192.168.1.1\Share\%uživatelské_jméno%
Cesta k profilu slouží k přiřazení cesty adresáře uživatele domény. Můžete ji přiřadit jako vzdálenou sdílenou složku.
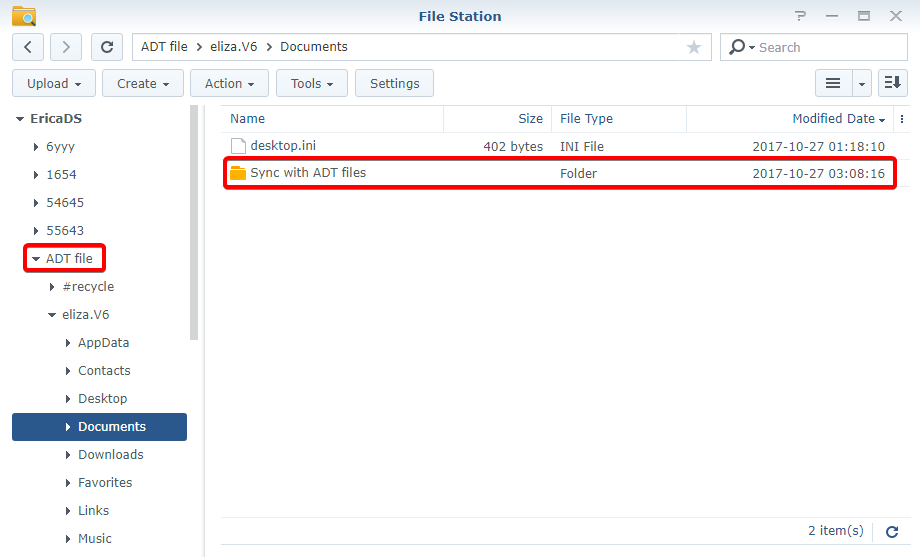
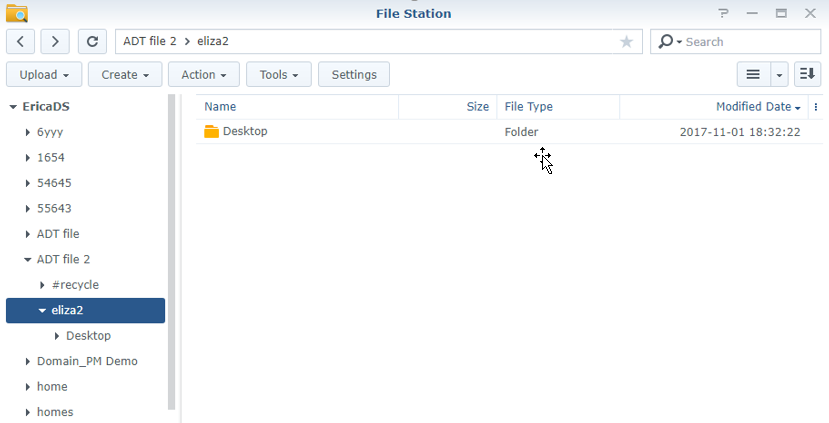
- Když se do systému Windows přihlásíte jako uživatel domény, vytvoří systém Windows ve vzdálené sdílené složce automaticky odpovídající adresář uživatele. Uživatelé nezaznamenají v každodenním provozu žádnou změnu. Pokud ale vytvoříte v rámci uživatelova profilu soubory nebo složky, synchronizují se při odhlášení data do přiřazené cesty.
3. Přiřazení adresáře uživatele všem uživatelům
- Přihlaste se do systému Windows jako správce domény.
- Než začnete, přesvědčte se, že máte nainstalovaný nástroj Windows RSAT. Podrobný postup se nachází v tomto článku.
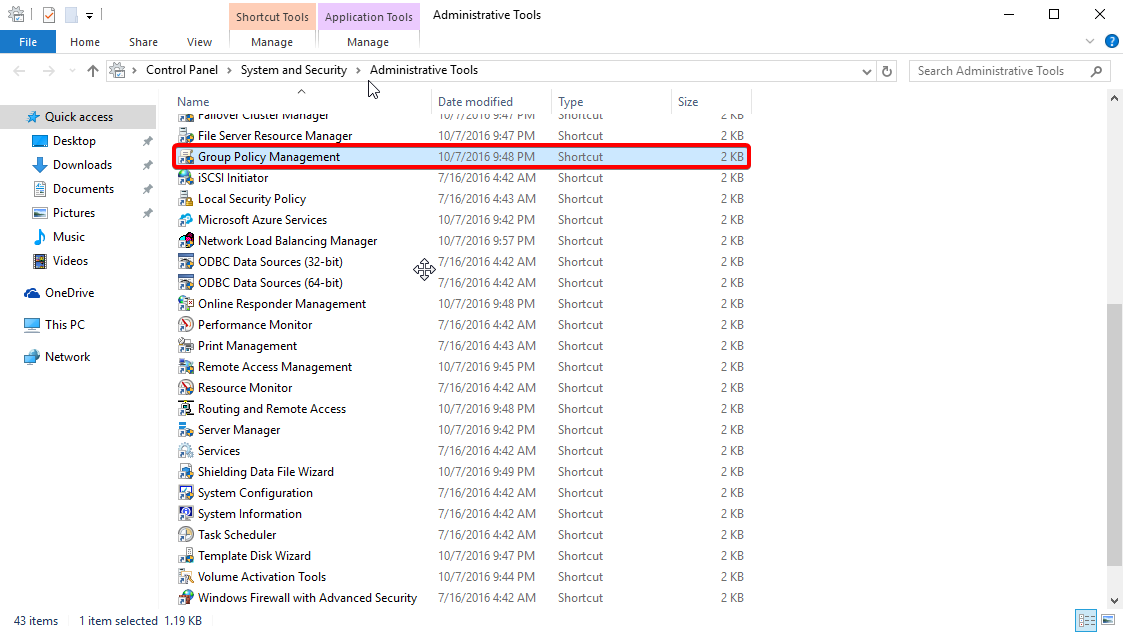
- Přejděte do části Ovládací panel systému Windows > Systém a zabezpečení > Nástroje pro správu > Správa zásad skupiny.
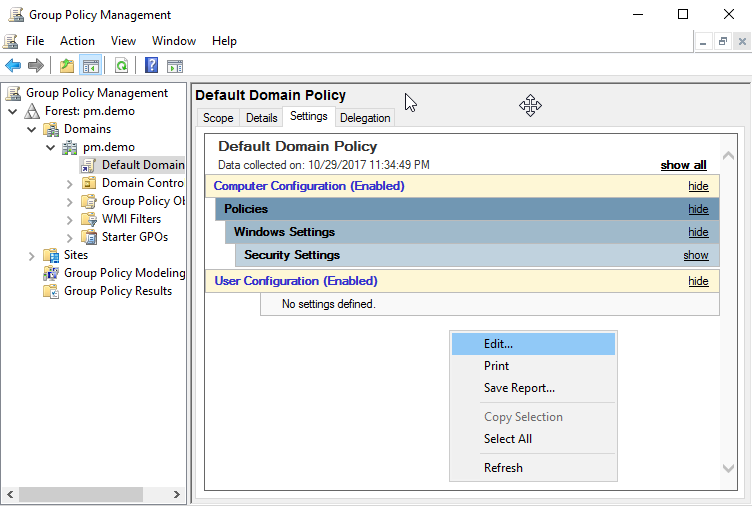
- Přejděte do části Doménová struktura: pm.demo > Domény > pm.demo > Default Domain Policy.
- Přejděte na kartu Nastavení, klikněte pravým tlačítkem na prázdné ploše a vyberte možnost Upravit.
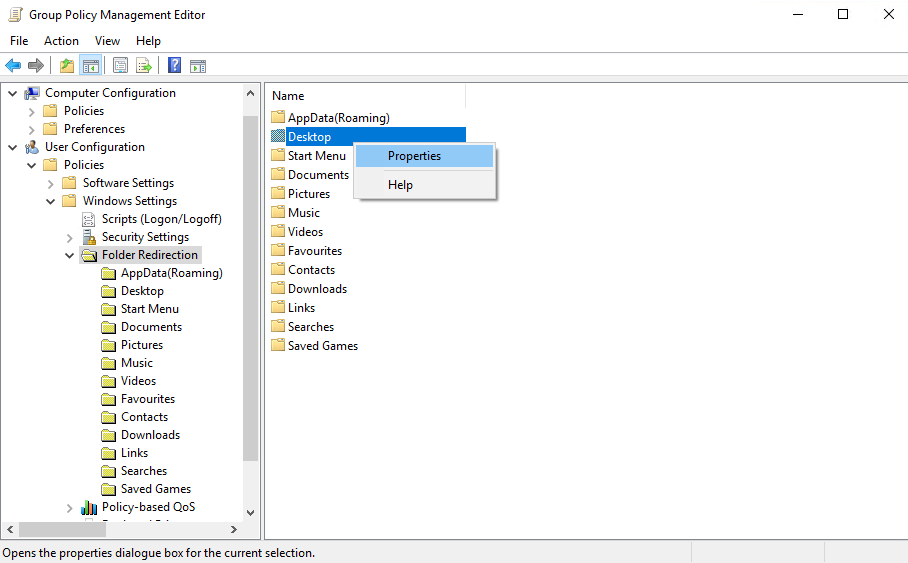
- Přejděte do části Konfigurace uživatele > Zásady > Nastavení systému Windows > Přesměrování složky.
- Klikněte pravým tlačítkem na složky, které chcete přesměrovat, a poté klikněte na možnost Vlastnosti.
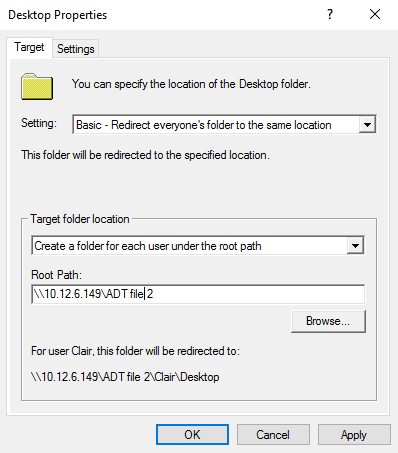
- Přejděte na kartu Cíl.
- Vyberte možnost Základní-Přesměrovat složky všech uživatelů do stejného umístění.
- Do polí Umístění cílové složky a Kořenová cesta zadejte potřebné informace.
- Klikněte na možnost OK.
- Adresář uživatelů domény bude přesměrován do přiřazené cesty.
Zdroj: https://www.synology.com/cs-cz/knowledgebase/DSM/tutorial/Management/How_to_Assign_a_Home_Directory_to_Synology_Directory_Server_Users
We have AD with Folder Redirection and Roaming Profiles
1: We opened the synology and updated it to latest version. (installed File station) Named it NAS10150(Our Inventory #) you can name it w/e you like.
2: Joined the Synology to the Domain ( We have a DS916+)
3: Created a new Folder called „Profiles“ You can name this whatever you like.
4: Right Clicked Profiles in the File Station and selected Properties ( the left hand side, the latest update for some reason the buttons at the top don’t work)
5: Click Advanced Permissions
6: Check Enable Advanced Share Permissions
7: Under „local Users“ Guest No Access Admin Read/Write
Change to domain Group:
Set groups you want to have access to Read/Write Domain Users Enterprise admins Domain Adminss, T3 Password Reset ect…
Hit OK
8: Clicked Permission
Permissions are as follows:
Guest – Deny – Check everything
DOMAINNAME\admin Allow Read & Write
DOMAINNAME\bsharpe Allow Read & Write (bsharpe is my profile) Its not required you set yourself in here if your using groups correctly I just do it because If anything ever changes to a group or I’m accidentally removed I’m not denied permission.
DOMAINNAME\domain admins Allow Read & Write
DOMAINNAME\enterprise admins Allow Read & Write
DOMAINNAME\domain users Custom Read & Write <- Traverse Folders / Execute Files List Folder / Read Data Create Folder / Append Data (Apply to set it to „This Folder“)
Owner Allow Full Control
administrators allow Read & Write
Now that the folder permissions are setup we can setup the AD / Server Side.
From your client computer or server you should be able to access it via \\NAS10150\Profiles or Whatever you named your NAS and the Folder Name. (At this point its an empty folder)
First you need to open your AD and find the user profile you want to place on the NAS.
I’m assuming you have AD role installed on your Server, and GPO installed as well.
I’m assuming you created an OU inside the domains AD. EG: AD Users and Computers > domain.org > domain > Users > Bob Hope
We are going to open up Bob Hopes Properties select Profiles
\\NAS10150\Profiles\BHope\Profile to apply to large groups you can use \\NAS10150\Profiles\%username%\Profile and it will auto put in the profile name.
We want a home folder for easy access for this user. \\NAS10150\Profiles\BSharpe or \\NAS10150\Profiles\%username% and it will auto put in the profile name.
You can choose any Drive Letter you want, we recommend something far down the alphabet so local connected drives don’t conflict. Z is what we used.
Make sure in Member OF the user is part of the user group you assigned in the permissions above. If You want you can make a new user group for Permissions.
Now that the user profile is pointed in the right place we want to make sure the Folders Follow them computer to computer without causign too much load time.
So we need to open Group Policy Management
Right Click the OU that your User is listed under.
Select Create a GPO in this domain, and Link it here…
We named our NAS10150 Folder Redirection , starter source is „None“
Right Click it and Edit
Set the Below:
User Configuration > Policies > Windows Settings > Folder Redirection
[b]App Data (Roaming): [/b] Basic
Path: Redirect to local user profile path
Options check box’s in order from top to bottom: Disabled > Disabled > Enabled > Restore contents
Contacts : Basic Redirect everyones folder to same location
Path: Redirect to local user profile path
Options: Disable > Enabled > Disabled > Restore contents
Desktop : Basic Redirect everyones folder to same location
Create a folder for each user unthe root path.
Path: \\NAS10150\Profiles
Options: Disabled > Enabled > Enabled > Restore
Grant user exclusive rights to Desktop Disabled
Move the contents of Desktop to the new location Enabled
Also apply redirection policy to Windows 2000, Windows 2000 server, Windows XP, and Windows Server 2003 operating systems Enabled
Documents: Basic
REDIRECT TO USER’s HOME DIRECTORY
Grant user exclusive rights to Documents Disabled
Move the contents of Documents to the new location Enabled
Also apply redirection policy to Windows 2000, Windows 2000 server, Windows XP, and Windows Server 2003 operating systems Enabled
Policy Removal Behavior Restore contents
Pictures Follow the documents folder
Music Follow the documents folder
Video Follow the documents folder
Favorites / Contacts / Downloads / Links / searches / saved games ALL Redirect to local userprofile
Now that the profile locations are directed we need to continue to edit the same policy to make sure admins can access these locations and local users can’t play with their settings to mess up sync.
User Configuration > Policies > Administrative Templates > Network / offline Files
Prohibit user configuration of Offline Files Disabled (I’m pretty sure best practices says Enabled but my work has some odd managers)
Synchronize all offline files before logging off Enabled
Ideally this should be its own policy!!!! You can make a new one the same way you made this one. It’s bad practive to mix USER and COMPUTER Policies under a single policy.
Computer Configuration > Policies > Administrative Templates > System/User Profiles
Add the Administrators security group to roaming user profiles Enabled <- Now your admins can access user files!!!!
Close the editor.
Now we need to link it to what it needs to be linked to.
Scope / Links
Location: This is the OU it’s under. This should auto fill the the location of the GPO there is no need to alter this.
Security Filtering: This is where we tell it who or what to apply this GPO inside the OU To.
In our case we have a Group for Folder Redirection and Domain Computers. Since we setup this GPO and were lazy both the computer and user policies are inside the single GPO.
We have Domain Computers, and Folder Redirection. You can also use Domain users because if you didnt add a Folder Redirection Group to your security permissions at the top the NAS wont allow you create folders as a USER.
Right Click the policy and set it to ENFORCED
Go to a computer that is already joined to your domain.
Login as the local admin
Open command prompt, doesn’t need to be as admin. (cmd)
type gpupdate /force
when it finish’s type gpresult /r
Under APplied Group Polic Objects you should see your GPO you made.
REBOOT the computer.
Login as a user who is redirected.
Source: bsharpe@bsharpe*